Crankshaft Buyer's Guide
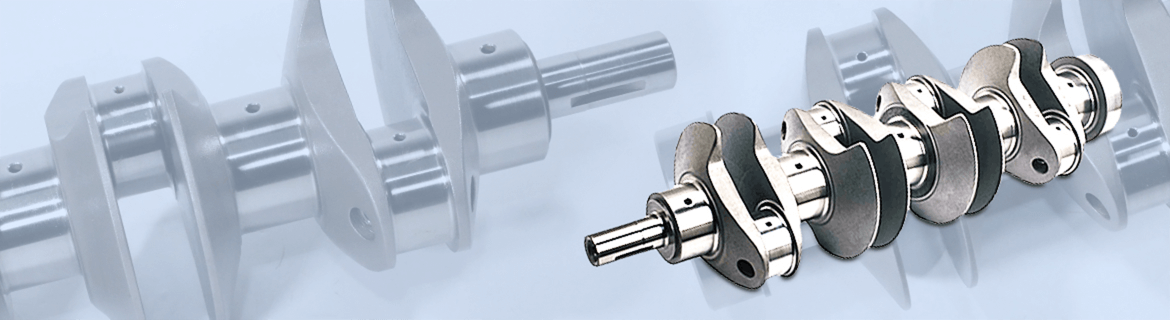
What is a crankshaft?
A crankshaft is a fundamental feature in a vehicle's engine. It is the system that converts linear energy into rotational energy. This enables the wheels to drive the car forward. All the pistons in the engine are attached to the crank which is also connected to the flywheel. The crank works in association with other engine components to achieve a synchronized motion.
How a crankshaft works?
Fundamentally, the crankshaft performs a simple task: translate the linear motion of the pistons into
rotation. It's doing the same job as the crank arm of a bicycle, which turns the more-or-less up and
down motion of your legs into rotation.
The crank moves the pistons up and down inside the cylinders. The movement of the pistons is regulated
by the crank. A component known as the camshaft also ensures that the pistons work properly. Whenever
the crank rotates, the camshaft must also rotate along with it. This is because the two components are
linked together. The two engine parts have a synchronized movement. When the camshaft rotates it causes
the intake and outtake valves to open. This allows a flow of air which is important to cause explosions
in the cylinder. Explosions are created inside the cylinders in the engine. The explosions exert
pressure on the pistons so that they maintain their movement. These explosions result in movement of the
wheels. The moving pistons give rise to jerky movements. The flywheel which is found at the end of the
shaft helps to ease the erratic movement. When the shaft moves, it causes the flywheel to adopt a
circular motion. Notches in the flywheel help it to achieve a more regular motion. This motion
eventually causes the vehicle's wheels to turn since the flywheel is connected to other engine parts.

How to buy a crankshaft?
Selecting a crankshaft is never an easy thing unless you get to know these things nicely. You can find your specific crankshaft part by entering your vehicle's year, make and model, if for any reason you cannot, you can find it by the part's Original Equipment Manufacturer (OEM) number. The OEM part number can be found directly on the part itself. You can also call a dealership with your VIN, and they will provide you with the OEM part number. You can contact one of our car specialists through our website for further assistance in purchasing your crankshaft parts.
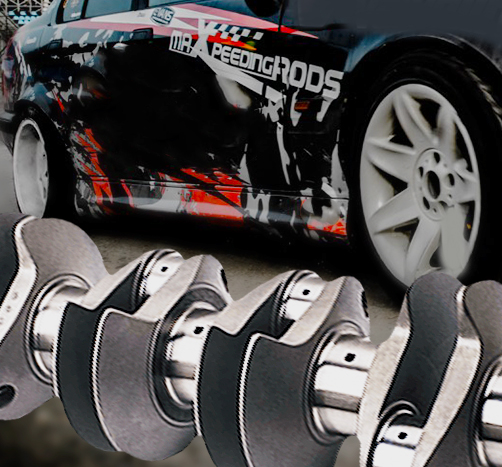
Why buy crankshaft at MaXpeedingRods?
MaXpeedingRods has been engaged in the research of overseas racing products and culture for
decades. If you are looking for crankshaft, you have landed at the right place. On the basis of
your vehicle make and model, you can choose from a plethora of automotive maintenance and
accessories. MaXpeedingRods offers a seamless online shopping experience and the streamlined
e-commerce interface makes it easy for you to find just the crankshaft you want.
MaXpeedingRods offers a variety of crankshaft with high quality.
• Increase crankshaft strength to 200%
• Pure high strength anti-wear 4340 aerospace steel
• Minimum heat treatment deformation
• High strength abrasion resistance and corrosion resistance
• Uniform distribution of strength
• withstand up to 1000BHP
• Professional deep nitrogen treatment
• Improve wear resistance to reduce oil pressure loss
How to install a crankshaft?
Replacing the crankshaft is usually part of an engine overhaul job. However, unlike many other components you can simply remove from around the engine block, removing, handling and installing the crankshaft requires a special procedure. Since you are replacing or reconditioning the crankshaft, plan on installing a new set of bearings as well. With the engine out of the vehicle and the rest of the components off the block, you are ready to work on the crankshaft.
Removing the Crankshaft
Step 1: Mount the engine block on an engine stand for support or set it on a workbench.
Step 2: Inspect the main bearing caps. They should be numbered consecutively, starting at the front
of the engine. Arrows on the caps should point to the front of the engine as well. If necessary, use
a stamping die set to identify each cap so you can replace them in their exact location and
position.
Step 3: Rotate alternately each bearing cap bolt a 1/4-turn counterclockwise starting at the center
of the block and working toward the front and rear until you can remove the bolts by hand. Use a
breaker bar and a short socket, and keep the bolts organized so you can replace them in their
original location during the reassembling process.
Step 4: Remove the main bearing caps from the block. If necessary, gently tap each cap with the
wooden handle of a hammer to dislodge them from the block. Keep each main bearing attached to the
inside of the caps when you remove them.
Step 5: Lift the crankshaft off the engine block with an assistant's help and set the crankshaft in
a safe place standing in an upright position. This will prevent the crankshaft weights from weighing
down on the unit's center line. Replace the bearing caps in their original location on the engine
block and install the bolts finger-tight in their respective place.
Step 1: Take the engine block and crankshaft to a machine shop for cleaning, inspection and, if
necessary, reconditioning. Ask them to check for crankshaft end play and provide you with the
correct bearings' size. And remember to store the crankshaft in an upright position until you are
ready to reassemble it.
Step 2: Mount the engine block on the engine stand or set it on a workbench.
Step 3: Install the new bearings on the engine block with the small bearing tab seating properly on
the recess provided on the block saddle. Make sure the small oil hole in each bearing aligns with
the oil hole in its respective saddle. Remember that the center bearing is built with flanges on
each side to control end play.
Step 4: Coat with a thin layer of moly-base grease the faces of the new main bearings you installed
on the engine. Coat the crankshaft journals as well. The journals are the area on the crankshaft
where the bearings will be resting on.
Step 5: Lay the crankshaft carefully on the engine block with the help of an assistant.
Step 6: Install the other half of the new bearings on the main bearing caps. Also, align the bearing
tabs with the recess provided on the cap saddle and coat the bearing faces with a thin layer of
moly-base grease.
Step 7: Install the bearing caps in their correct places on the engine block. Make sure the numbers
on the caps run consecutively from the front to the rear of the engine and the arrows on the caps
point to the front of the engine.
Step 8: Install the bearing-caps mounting bolts finger-tight. Tighten the bolts snugly using the
breaker bar and short socket. Finally, torque the bolts alternately in three steps starting at the
center and working your way to the front and rear of the engine. Use a torque wrench and short
socket. Consult your particular vehicle service manual for the correct torque to apply to the main
bearing caps. Or you may ask the technician in your machine shop for this number.
Step 9: Tap the crankshaft ends forward and backward 10 times with a brass hammer and retorque the
main bearing caps with the torque wrench and short socket.
Install the crankshaft pulley bolt at the front of the crankshaft finger-tight and rotate the
crankshaft several times to check for binding. Use the breaker bar and a socket.